Monday 31 August 2020

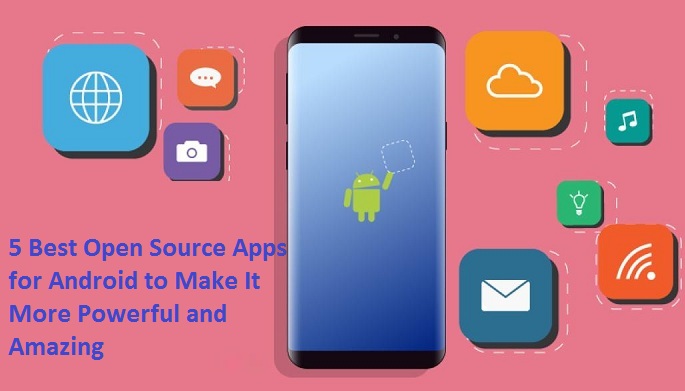
5 Best Open Source Apps for Android to Make It More Powerful and Amazing

 Open-source apps are the apps that allow their users to see, modify, and enhance their source code. Besides this, these apps also provide lots of unique and amazing features to its users, which can’t be found in other apps. But not all the open-source apps are created equal. Keeping this in mind, we are sharing with your five best open source apps that you can install on your Android mobile and make it even more powerful and impressive. So, let’s learn about these open-source apps in detail.

Firefox Browser (Price: Free)

Firefox Browser is a phenomenal open-source web browser that is used by millions of people worldwide for browsing the internet. It is a fast, reliable, and secure browser. Besides this, it comes with many impressive features like enhanced tracking protection, private browsing mode, picture mode, dark mode, etc. Additionally, you can also customize it as per your need/preference or install add-ons in it to further enhance its performance and functionality. You can also organize your tabs in the Firefox browser by creating collections in it. So, do install Firefox on your mobile if you are looking for a robust, secure, and dependable web browser for your mobile.

Free OTP Authenticator (Price: Free)

Free OTP Authenticator is a security app that allows its users to keep their online accounts safe and secured using One-time passwords. The app allows its users to generate one-time passwords on their mobile, which they can use with their regular login passwords to make sure no one can log in to their accounts by hacking their password. The app is compatible with online services like Google, Facebook, GitHub, etc.

Besides this, you can also use it to generate passwords even when you are offline, or when your phone is in airplane mode.

Nextcloud (Price: Free)

Nextcloud is a free and open-source app that allows you to store your data in its highly secure and reliable cloud server. Using it, you can easily upload your files, contacts, photos, calendar to the Nextcloud server. Besides this, it has a very clean, easy, and modern interface which provides its users with phenomenal user experience.  Additionally, you can also share your data and files with your friends or family members using the app. You can also host it yourself. Overall, it is a powerful and reliable app and can be very helpful if you have lots of data stored on your mobile.

Open Camera (Price: Free)

Open Camera is a completely free open-source camera app that you can use to capture impressive pictures on your mobile. The app comes with many great features like the auto-stabilize feature, noise reduction, focus bracketing mode, HDR, GPS location tagging, handy remote controls, etc. Besides this, it has a vast collection of color effects and grids. You can also set timers, record HD videos, take pictures using voice command, and much more by using it. Overall, it’s a fantastic camera app with lots of great features in it, which are designed to provide a great user experience to its users.

Phonograph Music Player (Price: Free/In-App Purchases)

Phonograph app is an excellent open-source music player app that has more than 1 million downloads on the Google Play store. The app has a very clean, appealing, and easy to use interface without any complicated menus in it. Besides this, the app includes lots of themes, Last.fm integration, tag editor, widgets, lock screen playback controls, go-to-actions, and much more. You can also customize your themes inside of the app. Overall it’s a marvelous app that not only contains all the essential functions of a typical music player app but also contains many other great features in it that can give tough competitors to many paid/premium music players in the market.

Conclusion

These are the five best open source apps that you can install on your mobile to make it even more powerful and amazing. So, make sure you try out these open-source apps on your mobile if you want to make it more powerful and impressive.

Hey there, I’m Oliviya . I’m a web developer living in USA. I am a fan of photography, technology, and design. I’m also interested in arts and web development. You can visit my site with a click on the button above. Also read my Blog, Ukreder

Source: 5 Best Open Source Apps for Android to Make It More Powerful and Amazing
5 Best Chromebook Tips and Tricks

Chromebooks are fast, robust, and reliable laptops or tablets that are being used by millions of people worldwide for surfing the internet, doing their Office work, playing music and games, etc. However, there are many things that you can do to get the most out of it. So, to help you out, we are sharing with you five best Chromebook tips and tricks that will help you in getting the most out of your Chromebook.


Use Third-Party DNS

There are many great reasons behind using third-party DNS while you are surfing the internet like they are more fast and secure and can easily bypass any restrictions placed by your internet service provider on its servers. To set up third -party DNS on your Chromebook:

  1. Navigate to the settings page.
  2. Next, click/tap on the name of the network that you want to update.
  3. Now go to the “Network” tab and click on the dropdown menu located near it.
  4. Finally, select/choose “Google name servers” if you want to use the Google DNS server or choose the “Custom name servers” option to manually enter your server address.

Use Chrome Overview Feature

Chromebook features an inbuilt overview mode (just like the “Expose” feature in Mac), which allows its users to see every window (Open window) at a glance. It’s a fantastic feature that can help you navigate to your preferred window without going through all the open windows manually. So, if you are someone who always has lots of open apps on his computer, then do use this feature to switch between the apps and save your time. To use this feature, swipe down from the top using your three fingers. Now you can easily navigate to your preferred window by clicking on its thumbnail.

Check Out All Your Keyboard Shortcuts

Chrome OS features lots of handy/useful keyboard shortcuts, which allows its users to do their work more efficiently and effectively. So, do check out and learn about these shortcuts if you want to get the most out of your Chromebook. To learn about all the available keyboard shortcuts in your Chromebook, press these keys together:” Ctrl+Alt+?” and you will be presented with an overlay of a keyboard that contains all the important functions and keyboard shortcuts in it.

Take Advantage of the Chromebook Perks

When you buy a Chromebook, you not only get a fantastic computer system but also get lots of freebies and gifts with it like Disney+ subscription, 100 GB of DropBox storage, a free copy of Dead Cells and much more. Amazing, right? So, make sure you don’t let these freebies and gifts slip away. To claim your perks and freebies, go to the Chromebook perks page and claim all the available perks and freebies from there.

Note: These freebies and perks are activated when you associate your Google account with the Chromebook for the first time and get expired after 60 days. So, make sure you claim them before they get expired.

Use an SD Card for Extra Storage

Most Chromebooks usually come with 32 GB of internal storage, which means you cannot store lots of data and apps in your Chromebook. However, you can solve this storage problem by putting an external SD card in the SD card slot of your Chromebook. Once connected, your SD card will appear inside of the “Files” app, and from there, you can quickly transfer your data and files to your SD card or access the already existing data in it.

Conclusion

There you have it guys, the five best tips and tricks to get the most out of your Chromebook. So, do use these tips and tricks if you want to get the most out of your Chromebook.

Hey there, I’m Oliviya . I’m a web developer living in USA. I am a fan of photography, technology, and design. I’m also interested in arts and web development. You can visit my site with a click on the button above. Also read my Blog, Easymzon

Source: 5 Best Chromebook Tips and Tricks

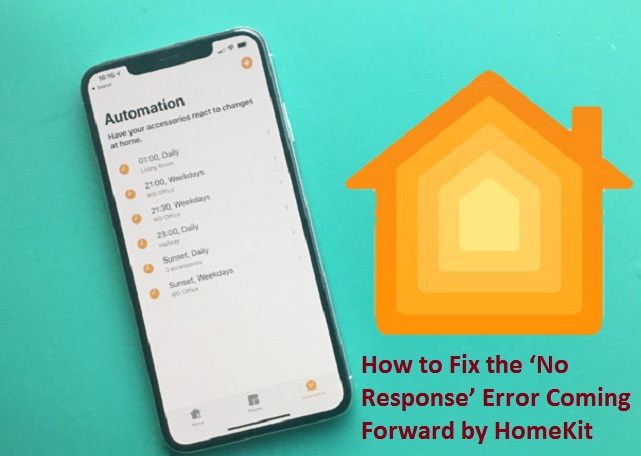
How to Fix the ‘No Response’ Error Coming Forward by HomeKit

Everything remains under control until or unless the HomeKit starts acting. No Response status does not just imply that you lose the capacity to control your home’s accessories. Instead, it can genuinely disturb a home.


Since HomeKit depends upon many factors, it includes numerous gadgets. Finding a precise fix for the ‘No Reaction’ issue can be somewhat dubious.  With a little tolerance, you can fix the error by following the tips mentioned below.

Start and try using basic settings to fix the ‘No Response’ error on your HomeKit app. Check if your iOS device is connected to the internet connection at home, also enable the Bluetooth feature if it is disabled.

Check if your iPhone is signed in with your iCloud account or not. Also, it is important to note that your iPhone must be updated to its latest update version.

Now the big question arises: how will you know if the No Response error is related to an accessory or the Home app? To check the same, you may use the device-specific apps to figure out if any accessory is creating a problem. If everything’s fine, you can finally pay attention to fix the HomeKit.

In case your HomeKit accessories appear with a ‘No Response’ notification when you are not at home, you may require a HomeKit Hub. A HomeKit Hub overcomes any issues between the accessory and the web, permitting you to get to your apparatus. Also, it enables you to create automation. 

There are three types of HomeKit Hubs available, including the fourth generation or later Apple TV, HomePod, and iPad. HomeKit Hubs are automatically enabled as soon as you sign in with your iCloud account during the setup process. Any HomeKit Hub that is enabled will appear as ‘Connected’ in the Home app, while other hubs will appear as ‘Standby.’

Sometimes, rebooting your device can fix all the basic issues occurring with your gadget. Rebooting the application, your iPhone, or the accessory are the quickest options to get the system running.

To reboot an accessory, all you need to do is unplug the same and take out the batteries. If you want to reboot your Apple TV, you’ll have to use a combination of buttons on the Siri remote to do the same. However, rebooting your HomePod is a complex process and needs to be taken care of while performing. The steps to reboot a HomePod are:

  1. Go to the ‘Home’ app on your iOS device.
  2. Select the ‘Rooms’ tab at the bottom of the screen.
  3. Locate the room where the HomePod is kept by swiping right or left.
  4. Tap and hold on the HomePod.
  5. Click on the ‘Settings’ icon in the lower-right corner.
  6. Select the ‘Reset HomePod’ option.
  7. A pop-up menu will appear. Select ‘Restart HomePod.’

Note: The accessories of your home might stop working temporarily if your HomePod is the HomeKit Hub.

If everything mentioned above fails to work, you may reset the accessory to the ‘Home’ app to get rid of the ‘No Response’ error.  It is important to note that once you reset the app or the accessory, it’ll return to its basic settings. Thus, you’ll have to make the changes accordingly.

Hey there, I’m Oliviya . I’m a web developer living in USA. I am a fan of photography, technology, and design. I’m also interested in arts and web development. You can visit my site with a click on the button above. Also read my Blog, Maxxadvisor

Source: How to Fix the ‘No Response’ Error Coming Forward by HomeKit

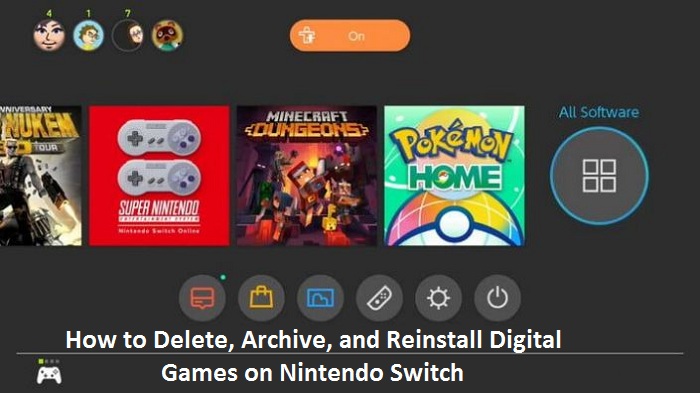
How to Delete, Archive, and Reinstall Digital Games on Nintendo Switch

 You might have a question: why would one want to delete digital games on Nintendo Switch? Now, think of a packed up internal storage of your device and you want to download the latest digital games on your Switch. That won’t be possible without deleting the old or unnecessary games if you don’t have an SD card. However, you don’t have to worry if you want to keep all the games, as they can be re-installed whenever you like.


Below is a guide on deleting, archiving, and re-installing digital games on your Nintendo Switch. If you’re keen to know more about the same, keep reading!

How to Delete a Digital Game on a Nintendo Switch?

You can delete games and their home screen icons to free up space on your Switch. The steps to do the same are:

  1. Open the Home Screen and bring up the game you want to delete.
  2. Hit the ‘Plus’ and ‘Minus’ buttons on the right and left side of the Joy-Con, respectively.
  3. The game’s ‘Options’ menu will open.
  4. Select the ‘Manage Storage’ option from the left toolbar.
  5. Hit the ‘Delete Storage’ option.
  6. Click on the ‘Delete’ option in the pop-up menu to confirm.

Following these steps will delete the game on your Switch and also remove the icon from the Home Screen. Fortunately, the data of the game doesn’t get removed, which means you can install the game anytime you like without losing the progress.

How to Archive a Digital Game on a Nintendo Switch?

Archiving a game on the Switch keeps the icon on the Home Screen as a shortcut for re-installing. Thus, if you don’t want to remove the game completely, you can archive the same instead of deleting.

The steps to archive a game are:

  1. Open the Home Screen and bring up the game you want to delete.
  2. Hit the ‘Plus’ and ‘Minus’ buttons on the right and left side of the Joy-Con, respectively.
  3. The game’s ‘Options’ menu will open.
  4. Select the ‘Manage Storage’ option from the left toolbar.
  5. Hit the ‘Archive Software’ option.
  6. Click on the ‘Archive’ option in the pop-up menu to confirm.

Following the steps mentioned above will remove the game from the Switch. However, the icon of the game will remain on the Home Screen.

How to Remove Game Save Data on a Nintendo Switch?

If you want to completely wipe out the game from the Switch, you can remove the game save data. It means that you’ll have all the progress and will have to start from the beginning if you re-install the game.

The steps to remove the game save data on your Switch are:

  1. Go to the ‘Settings’ menu from the Home Screen of your Switch.
  2. Select the ‘Data Management’ tab in the left toolbar.
  3. Click on the ‘Delete Save Data’ option.
  4. Click on the game for which you want to delete the data.
  5. Click on the Profile name for which you want to delete the game data or select ‘Delete All Save Data for this Software.’
  6. Click on the ‘Delete Save Data’ in the pop-up menu to confirm.

How to Reinstall a Game on Your Nintendo Switch?

As said earlier, you can re-install your favorite games anytime you want. Thus, the steps to re-download digital games are:

  1. Launch ‘eShop’ on your Switch.
  2. Select the profile using which you purchased the game earlier.
  3. Click on the profile icon in the top-right corner of the screen.
  4. Click on the ‘Redownload’ option in the left toolbar.
  5. Tap on the ‘Download’ icon on the right side of the game.

Once the re-downloading process completes, the game will appear on the Home Screen of your Nintendo Switch.

I’m Emma Justin . I’m a web developer living in USA. I am a fan of technology, entrepreneurship, and web development. I’m also interested in education and writing. You can visit my company website with a click on the button above. Also read our Blog, Pctechwire

Source: How to Delete, Archive, and Reinstall Digital Games on Nintendo Switch

Sunday 30 August 2020

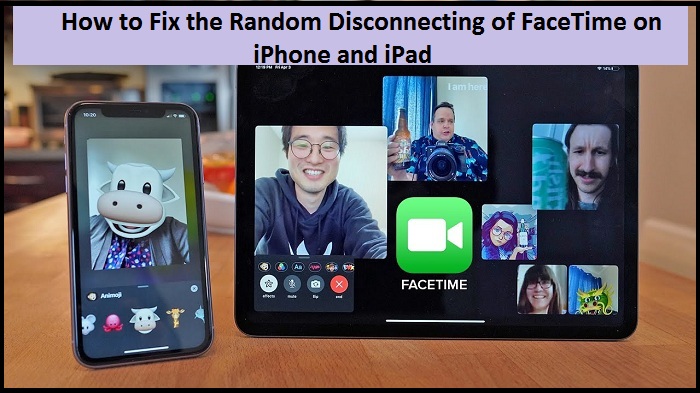
How to Fix the Random Disconnecting of FaceTime on iPhone and iPad

 It is way too annoying when you’re talking to your friends or family on a FaceTime call and the call keeps failing, disconnecting, or any other baffling issue keeps coming up. iPhone and iPad users face this error more or less often due to which people have switched to other third-party apps.


In case you’re coming across the same issues, it needs to be troubleshot and fixed before you experience another call failure.

How to Fix the FaceTime Disconnection on an iPhone and iPad?

The model of the iPhone and iPad doesn’t matter when it comes to fixing an issue. Thus, follow the methods mentioned below to get rid of the failing FaceTime calls.

Check Network Connectivity

Before looking for other significant fixes, make sure that your Apple device doesn’t have a poor network connection. Also, make sure that it’s connected to Wi-Fi or working on cellular data. Sometimes, if a network connection faces heavy traffic, it might keep you from undisturbed FaceTime calls. In such a situation, it is best to switch from Wi-Fi to some other internet connection. If you can not do the same, try other methods.

Reset Network Settings on Your Apple Device

The most usual solution to fixing a FaceTime disconnecting error is to reset the network settings. The steps to reset the network are:

  1. Go to the ‘Settings’ app on your iPhone and iPad.
  2. Select the ‘General’ tab and go to the ‘About’ section.
  3. Tap on the ‘Reset’ option.
  4. Select ‘Reset Network Settings.’
  5. Click on the ‘Confirm’ option to continue.

Note: It is advised to take a note of the Wi-Fi password because once you reset the network settings, it’ll lose all the data.

Once you reset the network settings, try making a FaceTime call and check if the error is still occurring.

Reboot Your iPhone or iPad

Sometimes, switching off your Apple device for a few seconds, and then turning it back on can fix all the minute issues. Therefore, rebooting your iPhone or iPad will refresh the processor and may fix the disconnection error occurring with FaceTime.

Don’t Let Your Device Overheat

iPhone/iPad performance is also affected due to its overheating. It is advised to keep your Apple device away from direct heat such as Sun, or near any device ventilation area. If the device gets hot, take it out of the case and place it somewhere cool, for instance, under the fan. Also, strictly avoid keeping your phone on charge during that period.

All the methods mentioned above are useful for minor issues. Thus, any of these methods are likely to solve the error occurring with your FaceTime calls.

I’m Emma Justin . I’m a web developer living in USA. I am a fan of technology, entrepreneurship, and web development. I’m also interested in education and writing. You can visit my company website with a click on the button above. Also read our Blog, Pcmagspot

Source: How to Fix the Random Disconnecting of FaceTime on iPhone and iPad

Friday 28 August 2020

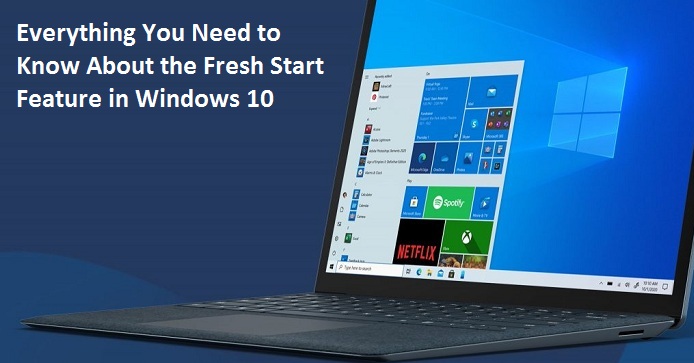
Everything You Need to Know About the Fresh Start Feature in Windows 10

 Windows 10 is a feature-packed operating system that is commonly used by a lot of users all around the world. It has always provided its users with the best computing experience with its unique features. A few months before, Microsoft rolled out the creator’s update for the users of the Windows 10 operating system and it has a new feature for its users called “Fresh Start”. It is an excellent feature and is similar to the functionality of “Reset your PC”. The Fresh Start feature enables the users to reset their Windows 10 device with the latest version of the operating system. And not only this, but it also wipes out most of the unused applications, along with the ones that come pre-installed on your device. Earlier, this feature was added to the Windows Security Application, but now it is a part of the “Reset Your PC” feature.


Are you a Windows 10 user? Do you want to know more about this new feature? If yes, then this article will let you know all the detailed information regarding this feature along with the ways to use it on your Windows 10 computer system. Here, in this article, we are going to provide you with the methods for using the Fresh Start feature on your Windows 10 computer. So, to get the techniques, please go through the complete article.

The Method to Follow for Using the Fresh Start Feature in Windows 10

Anyone can easily use the Fresh Start feature on their Windows 10 computer system. But, before you proceed with the methods, you need to make sure that you have a stable internet connection along with enough storage space on your device for a clean install. Installing this tool with the Windows 10 updated version will take at least 3GB of your memory space. And also make sure that you backup everything that you want to keep on your device. It is also worth noting that this feature is no longer called by the name of the “Fresh Start” and if you want to remove the bloatware applications from your computer systems, you will need to enable some special options.

Using this feature is a simple task to accomplish, and it includes some easy steps that anyone can go through without any difficulty. So, now, without waiting for any longer, let’s see the method to use this feature.

The Steps for Using the Fresh Start Feature in Windows 10

To get started with using the “Fresh Start” feature on your Windows 10 computer, you need to follow the below-mentioned steps:

  • To begin with this feature, firstly, you will need to restart your computer system. To do this, go to the “Settings” of your computer and then select the option of “Update and Security”.
  • And now, click on the “Recovery” option and then hit the “Get Started” button that you can find under the “Reset this PC” section.
  • Next, on the next screen, go through the option of “Keep My Files”. This way, all of your files will not be removed from your device.
  • If you have stored the Windows installation file on your PC, then you need to select the option of “Local Reinstall”. Otherwise, you can also go for the option of “Cloud Download” to download the Windows 10 installation file from Microsoft.
  • And now, go to the “Additional Settings” screen and click on the “Change Settings” link.  
  • After this, toggle the button for the option of “Restored Pre-installed Apps” to disable it. And now, Windows will not reinstall the pre-installed applications on your computer system.
  • Lastly, click on the option of “Confirm” to complete the process.

And, now, all the pre-installed applications along with the deals like Microsoft Office and the drivers will be removed from your computer. If you want to install the drivers, you can find their installation files through their company’s website. And that’s it. This is how you can use the Fresh Start feature on your Windows 10 computer system. The process mentioned above is much simpler and straightforward to follow. And with this, I hope you will find this article useful. If you want to get more information like this, you can check out the related articles on our website.

I’m Emma Justin . I’m a web developer living in USA. I am a fan of technology, entrepreneurship, and web development. I’m also interested in education and writing. You can visit my company website with a click on the button above. Also read our Blog, Setupost

Source: Everything You Need to Know About the Fresh Start Feature in Windows 10

Thursday 27 August 2020

6 Best Sony Headphones You Can Buy

 Sony headphones are famous for providing exceptional sound quality and listening experience to its users. But not all Sony headphones are created equal which makes it very difficult to find a headphone which can fulfill all our listening needs. So, to help you out we are sharing with you a list of six best Sony headphones that you can buy.


Sony WH-CH710N (Price: $99.99)

Sony WH-CH710N is a phenomenal wireless noise cancellation headphone that has a sleek, rounded design. The headphone allows you to enjoy music without any distraction. It can also automatically gather information from the environment using its automatic AI Noise Cancelling function and improves its noise-canceling performance according to your environment. Besides this, it features dual microphones and ambient sound mode.

Additionally, it features a 300 mm driver, NFC, and a powerful inbuilt Li-ion battery with a battery life of 35 hours on a single charge.

Sony MDR-7506(Price: $97.79)

Sony MDR-7506 is an on-ear professional headphone that provides an incredible hearing experience to its users. It is a very light-weight, robust, and comfortable headphone that is designed, keeping in mind the studio environment. Besides this, it features a 40mm pet diaphragm and neodymium magnet, stereo unimatch plug, and gold connectors. It’s a perfect pick for someone who wears headphones for long hours or works in a broadcast and studio environment. Additionally, it’s not that expensive too. So, if you are looking for a cheap, light-weight and robust headphone, then it is a perfect pick for you.

Sony MDRXB50AP Extra Bass (Price: $29.99)

Sony MDRXB50AP is another great in-ear headphone/headset, which can provide outstanding hearing experience to its users. The headphone features a 12mm dome type driver unit, X-Bass for club-like sound, and neodymium magnets for fantastic sound quality. Additionally, it’s very light-weight and features hybrid silicone earbuds in its design (which makes you feel very comfortable even if you wear them for long hours), integrated microphone, and smartphone playback control. 

Overall, it’s a marvelous headphone/headset and can provide its users with a great listening experience. So, do buy them if you are looking for a cheap and robust headphone/headset for your smartphone. You won’t regret buying it.

Sony WI-1000XM2(Price: $199.99)

Sony WI-1000XM2 is a marvelous noise-canceling in-ear headphone. It features industry -leady noise-canceling technology, HD noise-canceling processor, and dual noise sensor technology. Additionally, it features a 0.35 dynamic driver, adaptive sound control, in-built microphone, intuitive controls for taking calls, activating Alexa or Google Assistant, and a powerful battery with quick charge technology that can provide a battery backup of 10 hours on a single charge.

Sony WI-C400(Price: $69.99)

Sony WI-C400 is a wireless in-ear headphone/neckband headphone that is famous for its high-quality sound and comfort. The headphone features 9mm neodymium drivers for high-quality sound, inbuilt mic for hands-free calling and intuitive controls for activating voice assistant/playing music/answering calls. Besides this, it uses vibration notification to notify its users about incoming calls and messages. Additionally, it supports NFC and comes with a battery backup of 20 hours on a single charge. Overall, it’s a very light-weight and comfortable neckband headphone.

Sony WF-1000XM3(Price: $179.99)

Sony WF-100XM3 earbuds/headphones are another great pick when it comes to amazing and powerful headphones/earbuds. They feature industry-leading noise cancellation technology, HD noise-canceling processor, digital sound enhancement engine, and dual noise sensor technology which provide exceptional sound quality to its users. Besides this, these earbuds come with a powerful in-built battery which can provide a battery backup of 6 hours with a single charge.

However, if your battery runs out, you can also use their handy charging case to charge your headphones/earbuds (3 charges). So, do buy these earbuds/headphones if you are looking for robust and reliable headphones/earbuds.

Conclusion

These are some of the best Sony headphones in the market, which can contain lots of impressive features and provide exceptional sound quality and listening experience to its users. So, make sure you check out these Sony headphones if you are thinking of buying a Sony headphone for your smartphone.

I’m Emma Justin . I’m a web developer living in USA. I am a fan of technology, entrepreneurship, and web development. I’m also interested in education and writing. You can visit my company website with a click on the button above. Also read our Blog, Findthelist

Source: 6 Best Sony Headphones You Can Buy

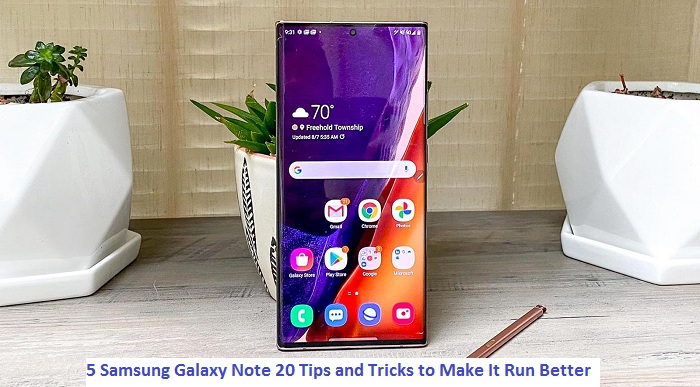
5 Samsung Galaxy Note 20 Tips and Tricks to Make It Run Better

 Samsung Galaxy Note 20 and Note 20 Ultra have excellent hardware specifications and lots of amazing features, and it’s very difficult that you will face any performance issues in these smartphones. However, if you face performance issues on your mobile, you can solve these issues by using simple tips and tricks. So, to help you out, we are sharing with you five simple tips to optimize your Samsung Galaxy Note 20 or Samsung Galaxy Note 20 and make it run better.


Set Your Display Refresh Rate to 120Hz

Samsung has equipped the new Samsung Galaxy Note 20 Ultra with a 6.9-inch dynamic AMOLED display with a refresh rate of 120Hz, which is more superior and powerful than the 60Hz refresh rate. This changes your screen resolution from Quad HD to Full HD and gives you a fantastic user experience while using your phone. So, if you want a fantastic user experience and make everything look clean and smooth on your display, then make sure that the 120Hz refresh rate is enabled on your Samsung Galaxy Note 20 Ultra. To do this:

  1. Open settings/settings app.
  2. Now tap/click on “Display.”
  3. After that, tap/click on the “Motion smoothness” option.
  4. Finally, select “Adaptive” if not selected already and then tap on “Apply” to change your refresh rate to 120Hz.

Check Your WI-FI/Data Connection

There are many things other than the phone’s hardware, which can affect the performance of your Samsung Galaxy Note 20, like your Wi-Fi or data connection. So, if you are facing any performance issue, then make sure you are connected to a stable Wi-Fi or data connection. To check if this is the case, go to the status bar (located at the top right side) of your phone and see the current strength of your data or Wi-Fi connection. If you see only one or two signal bars, you are probably connected to a weak Wi-Fi/data connection, and you must switch to a more stable internet connection to get the most out of your Samsung Galaxy Note 20 or Samsung Galaxy Note 20 Ultra.

Install the Latest Software on Your Mobile

Every Android phone receives regular software updates and security patches to address any security or performance issues. Therefore, you must keep your smartphone updated to avoid any security or performance issues. To check if a software update is available for your device:

  1. Open settings app.
  2. After that, scroll down to the bottom and click on the “Software Update” option.
  3. The device will check for updates and will notify you if an update is available for your device.
  4. Finally, tap/click on the “Download and Install” option to install the update on your Samsung Galaxy Note 20 or Samsung Galaxy Note 20 Ultra.

Use the Device Care Feature on Your Mobile

Samsung Galaxy Note 20 features a fantastic feature (Device care feature) that allows you to monitor, analyze, and optimize your storage, battery, and security and provide you information about your device’s health. It’s a very helpful feature that allows you to monitor your mobile’s health and ensure it’s working correctly. To use this feature:

  1. Open settings/settings app.
  2. After that, scroll down and click/tap on “Device care.”
  3. Finally, tap on “Optimize now” to optimize your phone and improve its performance.

Close Background Apps

Samsung Galaxy Note 20 and Note 20 Ultra is equipped with 8 and 12 GB RAM, which gives you plenty of space for installing lots of apps and games in it. However, if you have installed a heavy app or game on it, it may slow down your mobile’s performance by running itself in the background, and by closing them, you can give a significant boost to your mobile’s speed.  To do this:

  1. Open setting app.
  2. Navigate to “Device care.”
  3. Now tap on the “Memory” option.
  4. Finally, click on the “Clean now” option to free your RAM by stopping/killing your background apps.

Conclusion

These are a few simple tips and tricks that can help you improve your Samsung Galaxy Note 20 and Samsung Galaxy Note 20 Ultra. So, do use these tips and tricks to improve your mobile’s performance. Do you know some other tips that can help you improve the performance of Samsung Galaxy Note 20 and Samsung Galaxy Note 20 Ultra? If yes, then do share these performance optimization tip with us in the comment section.

I’m Emma Justin . I’m a web developer living in USA. I am a fan of technology, entrepreneurship, and web development. I’m also interested in education and writing. You can visit my company website with a click on the button above. Also read our Blog, Marthip

Source: 5 Samsung Galaxy Note 20 Tips and Tricks to Make It Run Better

5 Best Noise-Cancelling Headphones in the Market Right Now

 Buying a noise-canceling headphone is not that easy, especially when there are many great options in the market. However, you can easily make a decision if you know what you want and the price you are willing to pay. Keeping this in mind, we are sharing with you five best noise-canceling headphones in the market. So, let’s learn about them in detail.


Sony WH-1000xM4(Price: $349.99)

Sony WH-1000xM4 is an industry-leading noise-canceling headphone with dual noise sensor technology, which means you can hear every note, sound, and tune with amazing clarity. The headphone comes with a 30-hour battery life (with quick charging technology), sensor controls to pause/play/skip tracks, control volume, answer calls, and activate your voice assistant. Besides, it has a speak-to-chat feature, which automatically reduces the headphone’s volume during a conversation. Additionally, it has many other features.

•        Edge-AI.

•        Superior call quality.

•        Wearing detection.

•        Multiple device pairing.

•        Adaptive sound controls, etc.

Shure AONIC 50(Price: $399)

Shure AONIC 50 is another excellent wireless noise-canceling headphone that is developed to provide premium wireless studio-quality sound to its users. The headphone features adjustable noise-canceling and which can eliminate all distractions and give you incredible hearing experience. It also features environment mode, which allows you to hear the sound around you with the flip of a switch.

Additionally, it comes with Bluetooth 5 wireless technology (Range of up to 30 feet), 20 hours battery life, fingerprint controls to answer calls, activate voice assistant, adjust volume, or play/change music tracks. It’s a phenomenal wireless headphone.

Bose Headphones 700(Price: $379.95)

Boss Headphones is a phenomenal noise-canceling headphone famous for its powerful noise-canceling, incredible sound, and marvelous voice pickup. It features a four-microphone system that adapts to your surroundings and cancels background noises to ensure that your voice is heard entirely noise-free.

Additionally, it comes with features like controllable noise cancellation which allows you to personalize the sound of your surroundings/environment, 20 hours battery life, intuitive touch controls to manage your calls, control volume, play/skip/pause tracks, activate voice assistant, reliable Bluetooth connectivity, etc. It’s a very powerful and reliable headphone.

AKG N60NC (Price:249.95)

AKG N60NC is astounding on-ear wireless headphones. It features best in class noise-cancellation technology and a compact and foldable design. Besides this, it features aptX and AAC technology, which gives you incredible sound while playing music, streaming, AKG signature sound and 15 hours of battery life, Bluetooth 4.0, and intuitive controls to manage your calls and control volume, play or skip a music track.

Additionally, it’s not that expensive if we look at other popular headphones in the market with similar features. If you are looking for a cheap and reliable noise-canceling headphone, then this headphone is a perfect pick for you.

Sennheiser PXC 550-II (Price: 199.95)

Sennheiser PXC 550-II is another amazing noise-canceling headphone in the market. It features in-built Alexa, which can be accessed by the touch of a single button. Additionally, it features adaptive noise-canceling technology that can block all types of background noises and give incredible hearing experience, 30- hours battery life, voice assistant button to control voice assistant, smart pause feature, and touchpad controls to manage your calls, play/stop music tracks, etc.

It’s an outstanding headphone that provides a world-class hearing/listening experience to its users. So, do buy this headphone if you prefer headphones that provide superior sound-quality to its users.

Conclusion

Finding the right headphone is not that difficult, especially if you know what you want. So, if you are looking for a powerful and amazing noise-canceling headphone, then check out these phenomenal headphones because they can surely fulfill all your listening needs.

I’m Emma Justin . I’m a web developer living in USA. I am a fan of technology, entrepreneurship, and web development. I’m also interested in education and writing. You can visit my company website with a click on the button above. Also read our Blog, Themantar

Source: 5 Best Noise-Cancelling Headphones in the Market Right Now

How to Operate Live Captions on a Google Pixel Phone

 Whenever you watch any shows or movies on various streaming platforms, you must have noticed the captions appearing along with each dialogue. These captions make it easy for you to understand any video that is in a different language. Not only this, but there are a lot of other uses for the same.

The ‘Live Caption’ feature in a Google Pixel phone works in a similar manner. It is available in English and can be accessed along with any video, phone calls, podcasts, etc. Are you a Pixel owner or the potential buyer for the same, we’ll walk you through how Live Captions feature works on a Google Pixel phone.


How to Use Live Captions Feature on a Google Pixel Phone?

Before starting the process of using the Live Captions, check for the availability of the feature on your phone. The steps to do the same are:

  1. Swipe from top to bottom of the screen twice.
  2. Tap on the ‘Settings’ icon.
  3. Locate the ‘Sound’ tab and click on the same.
  4. Look for the ‘Live Caption’ option in the sound tab. If the option is available, it indicates that the feature works on your device.

The steps to use the Live Captions feature on a Google Pixel phone are:

  1. Click on the ‘Live Captions’ feature in the settings menu.
  2. If you want the captions to appear automatically as soon as an audio/video is played, turn the slider on for the ‘Live Caption’ option.
  3. If you want to create a shortcut for the ‘Live Caption’ feature to access it easily, turn the slider on for the ‘Live Caption in Volume Control’ option. It will allow you to manually enable/disable the feature.
  4. Whenever you tap on any of the volume buttons. A volume controls window will open. Hit the ‘Live Caption’ icon to turn on or off the feature.
  5. To get the ‘Live Caption’ feature to work while the on-going calls, click on the ‘Caption Calls’ option and select any one of the available options.

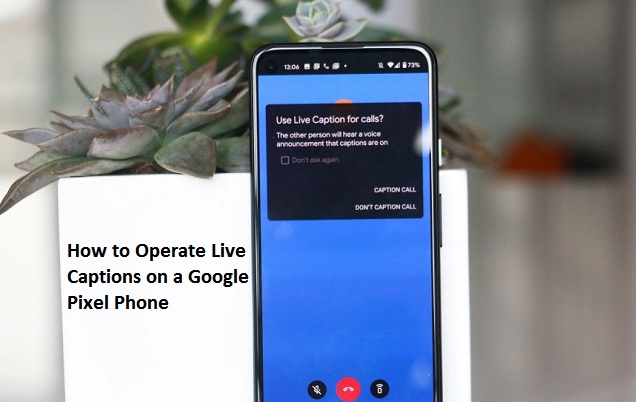
While enabling the Live Caption feature for calls, if you select the ‘Ask Every Time’ option, a pop-up menu will appear each time when you answer a call. Select any one of the two options: Caption Call or Don’t Caption Call. In case, you want to stop seeing the pop-up menu in the future, mark the checkbox for ‘Don’t ask again’ option. All the instructions appear based on the settings you choose for the ‘Live Caption’ feature. If you didn’t know about the feature, you can try them now by enabling the same.

I’m Emma Justin . I’m a web developer living in USA. I am a fan of technology, entrepreneurship, and web development. I’m also interested in education and writing. You can visit my company website with a click on the button above. Also read our Blog, Brownpilot

Source: How to Operate Live Captions on a Google Pixel Phone

How to Transfer Your Data from an Old iPad to the New One?

  If you have recently purchased a new iPad running on iPadOS 14 and want to transfer all your data and old memories from your previous iPad...