Tuesday 30 June 2020

Best Game Recording Software in 2020

Playing games on devices is fun. You get to try various moves, do some master actions, and much more, and when you complete the levels and win, it is a pretty satisfying and proud moment for you. And when you share your game’s winning journey with your friends, they might not clearly understand the way you will explain it to them, or they might not be able to imagine the actions that you did in the game to win. But what if you show them the video of your complete gameplay? It will help them understand better about the actions you did, the steps you took, and almost everything you did to win the game. Watching the game video will make them understand your wordings clearly. As it will act as a kind of presentation, in which you will be describing the incidents and there will be a live video going on in real-time, which will make your explanation more effective and understandable.
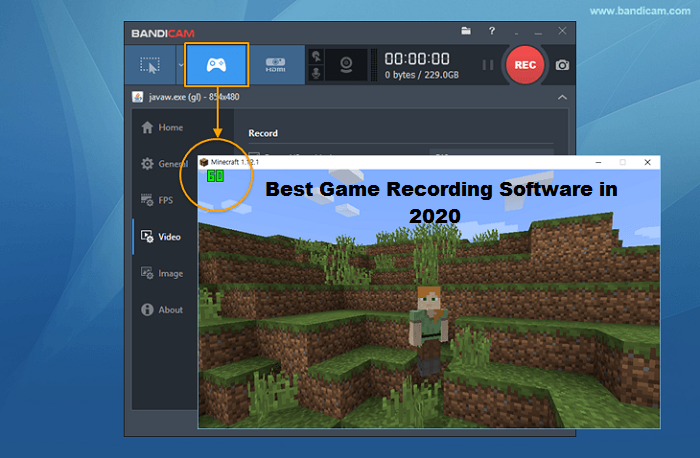
There are already many screen recording apps available in the market for other purposes. But with the advancements in recent years, luckily, we now have screen recording software for gaming too. In this article, we have discussed some of the best and widely used gaming software. All of them are dedicated to gaming in particular.
  • OBS
The OBS (Open Broadcast Software) is an open-source freeware software that is compatible with Linux, Mac as well as Windows. Being open-source software, it can be checked and fixed if any bugs are present. It is a powerful production software that has tools with which you can create switchable transitions, mix audio levels, preview screens. You can also integrate the software with Twitch and YouTube to stream a live game.
  • Action!
It is the best game recording software if you want to record the games in high resolution. It provides the best high definition output and the highest frames per second. It can capture up to 120 frames per second with record video in 4K high definition resolution. It can be used to record the games on Android devices too. With Action!, you can directly do live streaming on various social media platforms like YouTube, Twitch, and many more. It uses very few resources and very few megabytes per frame while recording a game.
  • Fraps
It is a simple game recording software with not many additional features like OBS, but it is a lightweight and easy-to-use software, which weighs around 2.3 MB. It has a user-friendly interface without any complicated features, which makes it a simple game recording software. It has been in the field of game recording software for two decades. You can record the audio and video of the desired game in a resolution up to 7680 * 4800 at up to 120 frames per second. It is available in free as well as paid versions.
  • Nvidia ShadowPlay
You can benefit from this game recording tool if your system has an integrated or dedicated Nvidia graphics card. The Nvidia ShadowPlay runs on the systems that have Nvidia Graphics cards in them. The combination works well, and the software runs and records videos smoothly without any interruption while you are playing the game. The recording can be done in a high definition resolution of up to 1440 pixels with up to 60 frames per second. It has two different modes: Manual mode and Shadow mode. With the manual mode, you can record your game up to an unlimited period. While shadow mode, as by its name, denotes that it will automatically record the game of the last twenty minutes.
  • Radeon/AMD ReLive
Like Nvidia ShadowPlay, Radeon/AMD ReLive is an integrated game recording software that comes in the systems that have AMD’s graphic card. With this software, you can customize your recording requirements in real-time. It is the most advanced game recording software which lets you use the integrated chat system, separate audio track, show performance charts, and much more.
I’m Emma Justin . I’m a web developer living in USA. I am a fan of technology, entrepreneurship, and web development. I’m also interested in education and writing. You can visit my company website with a click on the button above.
Best Desktop Publishing Software for Mac in 2020

Every platform supports software of two characteristics: the ones that can run on multiple platforms and the ones that run only on those particular platforms. The platforms like Mac, Windows, and Linux have some of the software in common where the working of that software is similar on all the platforms, but they have different codebases for different platforms. However, there is some dedicated software that works on a particular platform. All the platforms, as mentioned above, have some software dedicated as well as some software in common.
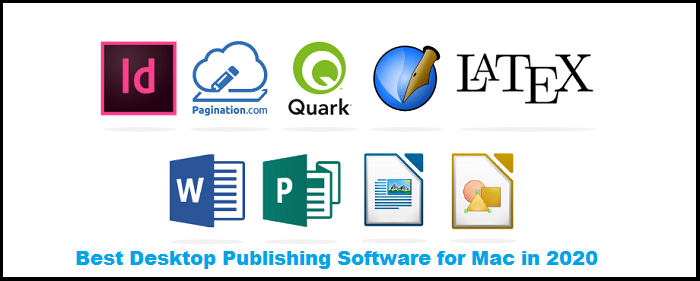
With the advancements in the software industry, companies are trying their best to reach more customers by bringing out the best and more efficient software for users. In this article, we will discuss the best desktop publishing software for Mac in 2020. We have listed in a sorted format along with their competitor software, as well as their substitutes. Some of them are particularly dedicated to Mac, while others are also compatible with other platforms. You may go through the list to obtain in-depth information about them.
In Terms of Photo Editing
  • Photoshop
First and foremost, software on our list for Mac PC/Laptop is Adobe Photoshop. Being one of the topmost photo editing software for decades, Photoshop has come a long way with its improved features for professional photo editing. It is one of the most professional photo editing apps available for Mac, Windows, and Linux. It has continued to evolve with more improved and advanced photo editing tools for enhancing photos, artworks, and illustrations along with other characteristics of the images. The latest version of this software is much more improved in terms of robustness and is certainly a step further than the previous version. It has a subject tool in which you can select a particular portion of the image, an improved brush performance for better detailing, new text styles, group layer arrangement techniques. You can opt for monthly, as well as an annual subscription of Adobe Photoshop. It comes with a seven-day free trial for testing, surpassing which you need to pay the amount for purchasing it. However, if you don’t want to use Adobe Photoshop, due to a certain reason, you may opt among the below-mentioned photo editing software.
  • Affinity Photo
If you want a budget-friendly photo editing software that is comparatively less in price than Adobe Photoshop, you should go for this one. Affinity Photo is one of the recent photo editing software which has developed and released, particularly by keeping in mind the efficiency of Adobe Photoshop. Though it is a newcomer and is recently released in the market, it has tough features which can compete stiffly with the Adobe Photoshop. It has almost every feature for pro-level photo and image editing. The features include a level of adjustments, panorama stitching, HDR merging, digital painting, 360 image editing, RAW as well as Photoshop file editing. It also offers four personas which you can use according to your requirements. This software also offers tutorials for beginners.
  • Pixelmator
If you want a more reasonable software in terms of photo editing compared to Adobe Photoshop and Affinity Photo, you can opt for Pixelmator. It is the best alternative that you can purchase for editing photos. This photo editing software has almost all the essential tools for drawing, sketching, texts and adding shapes, and much more. It comes in basic and pro versions. If your purpose is to edit photos on a basic level and not don’t require much high-quality professional-level editing, you may opt for its basic version. It may lack some features compared to Photoshop, but its completely fine if you only need it for basic purposes. But if you want it for some professional-level editing, you may opt for its pro version.
  • GIMP (GNU Image Manipulation Program)
It is free, open-source software that provides powerful and advanced tools for editing professional-level photos. With this software, you can add filters, layers, effects, and most of the other tools that are available in the paid software. GIMP can provide restoring capabilities, creative composites, and can handle retouching. All these features make GIMP a perfect free alternative to Adobe Photoshop.
For Business Management
  1. MS Office
Probably one of the most recommended and widely used industry-standard software package which is well suited with both Mac as well as Windows. This software package contains all the software setup of Word, Excel, PowerPoint, and others. You can purchase the Microsoft 365 subscription at a price of around $41.
  • Apple Pages
It is a word processing software by Apple that can merge both page layouts along with the word processing files. It can also merge graphic tools depending upon the document type. It is free to download the application on Mac and can be accessed by you and your group of friends for online collaborations.
  • Apache OpenOffice
Another best free alternative to Microsoft Office is Apache OpenOffice, which has integrated drawing and database tools, presentations, word processing, and spreadsheets tools. If you only need the tools for basic purposes, you may opt for Apache OpenOffice.
For Publishing Processes
  1. Adobe InDesign
If you need a software that can create templates according to your requirements, the first option you should go for is Adobe InDesign. It is the best software available in the market, publishing magazine layouts, posters, PDF reports with images and different types of typographies, and much more. You will be able to create and customize your document accordingly from the vast options which are present on the toolbar on the left and right side of the interface of the Adobe InDesign. From the vast options present in the toolbars, you can create, edit, modify pages, include drawing and texts, shapes and transform the images, and much more. Many more features get updated in the Adobe InDesign whenever its new version arrives. It comes in monthly as well as yearly pricings.
  • QuarkXpress
This software is the most active competitor of Adobe InDesign and is running for decades. With this software, you can not only create documents on a system but also on an iOS or Android device. QuarkXpress can be purchased with a one-time payment of %399. It has almost all the features and can do all the tasks efficiently like Adobe InDesign. The new features which QuarkXpress has included are: new color font supports, better HTML5 code export process, unlimited app creation, updated PDF print engine, OneType controls, and much more. You can also import an InDesign document into QuarkXpress.
  • iStudio Publisher
This software provides you with all the effective tools for publishing almost all forms of documents, like brochures, newsletters, booklets, posters, and invitation and menu cards. It has all the essential tools, including text wrapping, paragraph styling, shape size, and alignments, shadows and color fill, custom page sizes, drawing shapes, two pages spread editing, and much more. The iStudio Publisher gives you more than sixty readymade built-in templates that can be used to create documents. Even though it is a low-cost alternative to Adobe InDesign, it consists of many powerful tools for creating documents and is widely in use on Mac systems.
  • Scribus
It is an open-source desktop publishing app that is free to use. It has support for font embedding, PDF creations, pro-level drawing tools. It also supports CMYK formats, EPS import and export along with text frames and pull-down menus with drag and drop palettes and much more similar to Adobe InDesign and QuarkXpress and that too without any cost.
I’m Emma Justin . I’m a web developer living in USA. I am a fan of technology, entrepreneurship, and web development. I’m also interested in education and writing. You can visit my company website with a click on the button above.

Get Five Free Games With The Latest Doom Eternal Collection In Twitch Prime July: 2020

Good news for Twitch Prime subscribers! Twitch Prime is all set to give its subscribers five amazing free of cost games. The first one, Turok 2: Seeds of Evil, is going to amaze many game lovers. The game isn’t new, as it first got released in 1998. The second one on the list is Dear Esther. The game is packed with adventurous turns that will take your breath away.
The other three games offered in the Twitch Prime July: 2020 are the RPG Dark Devotion, GRIP: Combat Racing, and the superb KUNAI.
Doom Eternal has brought some fresh vibes amidst the dull and gloomy 2020. The exclusive Cosplay Slayer is all set to bring out the game-slayer in you. The Cosplay Slayer Master Collection also comes with a podium that’s upgradable, player animations, and a player skin.
The list of excitements doesn’t end here, July has much more to surprise you. The FIFA 20 Ultimate Team is nothing but a grand thrilling game. Grab a chance to play it as it is available only on 18th July. Bonus? You get to receive five new gold player items and the luxury choice of 83+ OVR. The next surprise to talk about is the Minion Masters; Crystal Conquest. This one will surely brush up your speediness with its fast-paced nature. No wonder it is going to be your go-to game in July.
Don’t forget to talk about the Word with Friends 2 with your best pal. This one will be made available on 6th July until 20th July. This means that you need to make the best of the limited time. The Black Desert Mobile is awaited by many, and their wait will get over on 7th July. The Yahtzee with Buddies is also an amazing game that will come on 9th July. The Apex Legends will be coming on 13th July, and the Runescape will be coming on 14th July.
Other top arrivals for the month of July include the World of Tanks, Grand Theft Auto Online, Red Dead Online, Mafia City and the superb The Seven Deadly Sins: Grand Cross. The Legends of Runeterra will come late in the month, on 29th July. Please take it as dessert after a heavy meal!
All these games are free of cost. After all the gloomy months of 2020 till now, July surely provides some relief with these power-packed games.
I’m Emma Justin . I’m a web developer living in USA. I am a fan of technology, entrepreneurship, and web development. I’m also interested in education and writing. You can visit my company website with a click on the button above.

These SEO And Content Trends Are The Talk Of Town

As technology is advancing with the blink of an eye, so are content and SEO trends taking new forms day by day. While 2020 may appear all gloomy, there are new content trends that will help you get better at your content creation. Revamp your website with these freshly arrived trends that will blow your visitors’ mind. Grab a cup of coffee, take a notebook and pen, and note down the trends you can make use. Levelling up is always a good choice. 

  • Is Your Content Ready For Voice Search?
People dread typing their query. Well, that’s no surprise, especially when they have the superb option of a voice search. In the writing time, not many individuals are surviving without a top-notch smart speaker. Thus, it is important to make your content ready for voice searches. Optimizing for voice search is the need of the hour. To do so, you must use natural language in your content. Make use of keywords that are commonly spoken and not typed. Make your content simple, so that it comes on top whenever someone uses the voice search.
  • Include Interactive Pieces In Your Content
Once you add more visuals in your content, you make it more interactive and appealing. Not only visuals but assessments, games, quizzes are all capable of enchanting the visitors. These interactive portions of your content can attract readers magnetically to you. These are great ways to make your content more interactive. Simplicity is the newest trend that must be appreciated and applied in the content creation stage.
  • Make Use Of Images Wisely
If your visuals don’t compliment your written content, it is of no use. However, if your images are too heavy to digest, this will also let your viewers down. Then, what is the perfect blend of images? The best way to add favourable visuals is to create your own images. This means that you should add infographics and simple images that are relevant to your typed words. Also, make sure that the file sizes aren’t too big. Heavy file sizes make the website load slower than usual. Don’t forget to rag your images with the best keywords.
  • Make Use Of Long-tail Keywords
A lesser-known fact is that around 70% of online searches have long-tail keywords. What do you understand by this? This means that if you use long-tail keywords in your blog content. Not only this, but it also makes your content compatible with voice searches.
Final Words
New trends come and go every year, making it difficult for marketers to stay up to date. Outdated trends must be left behind in order to succeed. You may require to study hard, research on your current website status, study about your audience, and figure out what’s necessary for your website. Keeping the situation of your website stagnant for a long time may bore your customers. People like to see new things and updates, especially when all the glitters of new advancements surround them. Bringing in new changes and modifying the existing work approaches is definitely a challenging task for all. Thus, only the ones who are capable of coping with these trends win the race. Do you understand what “survival of the fittest” means?
I’m Emma Justin . I’m a web developer living in USA. I am a fan of technology, entrepreneurship, and web development. I’m also interested in education and writing. You can visit my company website with a click on the button above.
Watch Starlink Probes In The Night Sky And Thank Elon Musk

The term “unstoppable” is synonymous to SpaceX. Elon Musk with his SpaceX team launched 60 Starlink satellites on 26 June. It was the 10th ambitious mission with regard to Starlink. The mission held an objective of providing internet access to the ones who are not yet privileged. The core mission of launching the satellites was to make affordable and trustworthy internet access available across the earth.

Earlier, the plan to launch the satellites was to be conducted on a prior date. However, with weather conditions being highly unpredictable lately, the launch had to be delayed till June, 26th.
How To See Satellites In The Night Sky?
 Curious to track satellites in the night sky? Put your phone to work! There are several apps that can help you. For Apple users, there is an app called Night Sky, which is available at Apple App Store. The app is completely free and can be helpful to find celestial bodies in the mesmerizing sky. Next, you can also talk about Satellite Tracker, which is an app that is available for both iPhone and Android users. All you have got to do is download any of the suggested apps, and make use of it standing beneath the sky.
All About The Starlink Mission
A grand constellation of thousands of satellites is what is needed to provide Wi-Fi to people from space. The official website states that the Starlink project isn’t an ordinary one. It is going to deliver great high-speed broadband internet to places where internet access wasn’t in good condition or didn’t exist at all.
Elon Musk is the mastermind behind the determined project, with SpaceX being his dearest endeavours. SpaceX has a strategy of its own. It launches satellites in groups of 60 at a time. Each of these groups is launched through a SpaceX built Falcon 9 rocket. Interestingly, these solar-powered probes sat in a lower orbit.
Starlink And The Night Sky
Not many astronomers are in favour of the mission. They argue that Starlink acts as an obstacle in the way of observations in the night sky, due to the reflected light from the satellites. Researchers like Denis Vida are highly worried about the final output of this mission. They say that it is concerning to imagine what the sky is going to look like after the successful launch of 42,000 Starlink satellites. On this, Musk clarified that there is nothing to worry as these satellites won’t obstruct the sky view. In his statement at Washington DC, the man asserted his confidence in the mission, saying that it won’t cause any harm in astronomical discoveries. He also promised that the team would take necessary corrective measures if any such inconvenience takes place. Elon Musk considers Starship rockets as his “top priority”, as it will take him ahead in his dream of building a human colony on Mars.
Moreover, the team of SpaceX is also looking for ways to make the satellites less shiny in order to avoid any inconvenience. The space world is never short of news. Nasa, too, is looking forward to its very first ‘Moon hike’ for 2024. The coming time will hopefully experience good changes because of these science experiments.
I’m Emma Justin . I’m a web developer living in USA. I am a fan of technology, entrepreneurship, and web development. I’m also interested in education and writing. You can visit my company website with a click on the button above.
Monday 29 June 2020

A Guide on How to Organize Better Using Notion

Notion is an application that keeps your documents, files, etc, organized. It has an all-in-one system that enables you to write, plan, and collaborate. It is a single workspace, not only for you but also for all the people who collaborate with you. Also, Notion can be used for personal as well as professional use.
Below mentioned are the few most important tools of this application:
  • Notes: This tool can hold all the information for you for any purpose. Whether you need to add something as a reminder, or plan a draft for project work, this is an efficient tool for every occasion.
  • Wikis: This is an in-built tool that has replaced the installation of third-party applications like Confluence. 
  • Projects and Tasks: To work with the team and discuss a project, this is the best suitable feature offered by the Notion app.
Advantages of the Notion App
The advantages of the Notion app are as follows:
  1. Working with the Notion app
The Notion application works for all the devices and can be installed without having to focus on a specific device. The application is free of cost for the students, while the teams can access the same with the help of Team plans.
  1. Sidebar Navigation
Most of the important tools are listed on the left side of the window. These tools are settings, templates, etc, and are easy to access.
Working with the left sidebar will help in a lot of activities. Thus, it is important to go through the same and learn more about the tools.
  1. Creating a page
The first and foremost step to work with this application is creating a page. The ‘+ New Page’ option is present on the bottom of the left toolbar. Just one click will lead you to a new page, that’ll be called your workspace.
You can also use a template instead of a custom workspace. Click on the ‘Templates’ option on the left toolbar and a list of templates will appear. You can go through and select any template to use.
  1. Using Slash commands
You can use the slash key (/) for the content menu to pop-up on the screen. The list of the content menu will appear as soon as you enable the command.
  1. Adding Blocks to your Workspace
A managed and organized content is the most appealing to the audience. Therefore, you can add tables, images, headers, etc, to make your content look presentable.
It is advised to avoid the combination of all the blocks as it can look very tacky. Instead, use blocks that are most suitable for your workspace.
  1. Use toggles
The toggle feature will leave a great impact on your reader, simplifying things for them. You can access the Toggle command that is available in the content menu.
The Toggle command can be used to switch between pages by a single click.
  1. Install the Notion Web Clipper
To improve the efficiency of the communication, one must install the Notion Web Clipper. Once you install the Web Clipper, you’ll easily be able to import content like images from the pages you visit your workspace.
Downloading the Web Clipper is the most effective when you’ve to organize links of different sites in one place.
I’m Emma Justin . I’m a web developer living in USA. I am a fan of technology, entrepreneurship, and web development. I’m also interested in education and writing. You can visit my company website with a click on the button above.

How to Change the White Background to Transparent Using Paint

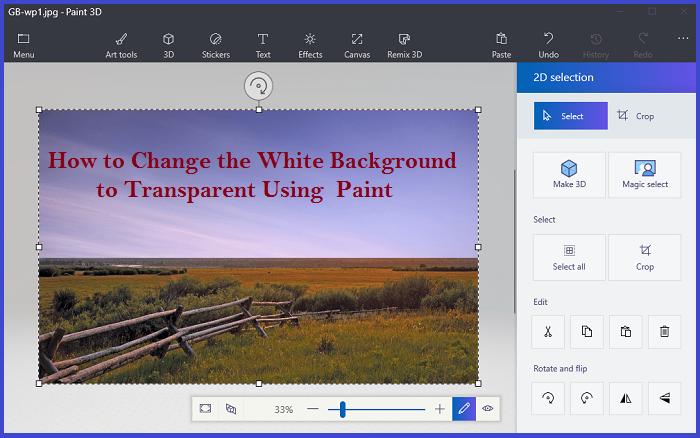
Paint is a default application that comes with the Windows PC and has a lot of tools and features to work and explore. While you know all about its basic features, many people are not aware of its ‘Transparent Selection’ tool that changes the white background to the transparent one in the Paint app.
What is Transparent Selection in MS Paint?
MS Paint app is a go-to application for a casual editing experience or using basic tools to edit images. Tools like crop, rotate, etc provide the same function as any other editing software.
Talking about the Transparent Selection tool, many times, it is required to change the background of an image to a transparent one. Thus, this tool is quite satisfying to perform this function. Any part of the image can be turned to transparent with the help of this tool.
Note: Due to very limited features present in the MS Paint, an image with a transparent background can not be saved, and changes back to White while saving.
How to turn the White background to transparent using MS Paint?
The steps to extract a color from an image to make it transparent in MS Paint are:
  1. Go to the ‘MS Paint’ app from the search bar on your PC.
  2. Browse and open the image that you want to make changes to, and to do so, the steps are as follows:
  3. Click on the ‘File’ button on the top of the window.
  4. Tap on the ‘Open’ from the list and you can browse the image from the folder.
  5. An alternate method is to open the image and right-click on the same. Next, select the ‘Open With’ option from the menu and click ‘Paint.’
  1. Once the image gets opened in the MS Paint, select the ‘Color 2’ option from the toolbar.
  2. Select the background color from the ‘Color 2’ menu. For example: if the background color is White, you must select a shade similar to it.
  3. Select the ‘Eyedropper’ tool on the toolbar after selecting the color.
  4. Now, tap on the background to pick the color with the eyedropper tool.
  5. The next step is to detach the color of the background from the image. Therefore, click on the ‘Select’ menu on the toolbar and a drop-down window will appear.
  6. Tap on the ‘Transparent Selection’ option from the drop-down menu. Make sure the checkbox is marked to enable the tool.
  7. Next, select one of the two options from the selection menu: ‘Rectangular Selection’ or ‘Free-form selection’ depending upon the selection form of the image.
Note: These tools can be used only if the ‘Transparent Selection’ checkbox is marked.
  1. Press and drag to select the image that you want to detach from the background. You must not release the Mouse while making a selection.
  2. After selecting the image, right-click on the selected area, and a drop-down menu will appear.
  3. Select the ‘Cut’ or ‘Copy’ option to copy the image to the clipboard.
  4. Next, open the alternate image where you want to paste the selected portion. Right-click on the place and select the ‘Paste’ option.
Note: You can rotate and resize the image, any way you like.
How to save the cut images?
Saving the images with a transparent background is not an option in MS Paint thus, the cut images can not be saved. Even if you try to save the image with a transparent background, the image will get back to its original form.
I’m Emma Justin . I’m a web developer living in USA. I am a fan of technology, entrepreneurship, and web development. I’m also interested in education and writing. You can visit my company website with a click on the button above.

Tips and Tricks for Saving Battery Life of Your iPhone

iPhone batteries drain quickly, and this is something known by everyone now. But have you ever wondered if there were any possibilities of saving your iPhone’s battery and extending its life along with improving performance?
Below mentioned are the tips and tricks for saving the battery life of your iPhone and save power.
  1. Enable the ‘Optimized Battery Charging’ feature
A new feature was introduced by iOS 13 that limits the total charge. The feature is automatically working on your iPhone, but you can check the same under the ‘Battery’ tab in the ‘Settings’ app.
The battery of your phone starts to corrupt when overcharged.  This feature keeps a check over your charging habits and limits the same. Therefore, enabling this feature might help you in improving the performance and saving the battery life to an extent.
  1. Remove battery hogs
Some applications use a lot of battery than the others. Thus, you can keep a check on the application draining too much battery by visiting the ‘Battery’ section in the ‘Settings’ app. A list of each application using their share of the battery will appear. You can limit the usage of the applications that take a lot of battery or use them while connecting to the charging port.
  1. Restrict notifications on your iPhone
Even though you aren’t using your phone, the incoming notifications flash the screen, vibrate or make a sound, use the Internet, etc that takes up the battery as well. You can limit or restrict these notifications by disabling the same under the settings app.
An alternate method to turn off the notifications is by holding the notification for a second or two, and a pop-up will appear. Tap on the three-dotted icon on the top of the notification and select the ‘Turn Off’ option. You can disable the notifications for the applications you don’t often visit, or aren’t important to you.
  1. Use dark-mode for OLED iPhone
iPhone X and above are the OLED Phones that use dark mode and have a lesser battery consumption than the light mode. OLED iPhone’s do not use backlight, rather the pixels of the screen use their own light.
Note: If you turn on the dark mode for other gadgets that are not OLED based, it doesn’t make much difference to the battery.
  1. Using low power mode
Low power mode saves the battery when you enable the feature. This feature can be turned on under the ‘Battery’ section of the settings app, or add a shortcut to the ‘Control Center.’
Enabling the low power mode feature has the following advantages:
  • Restrict the screen brightness as it drains a lot of battery
  • Incapacitate motion effects
  • Disables the activities going on in the background, like backups
This feature can be put to use when your iPhone is at a low charge, and you want to save it from a complete shutdown.
Note: keeping your phone on low power mode all the time can decrease its performance.
  1. Avoid enabling features that you don’t use
One way to upgrade your iPhone’s battery life is by disabling the features that you don’t use much. One example is Bluetooth, which must be turned off when not in use. You can turn the feature off under the settings app or from the control center.
You can also turn off the ‘Hey Siri’ mode as you don’t use it all the time.
Auto-brightness mode is another way to get rid of unnecessary battery drainage.
  1. Prioritize Wi-Fi over Cellular
It is understood when you’re outside and connected to the Cellular connection while the Wi-Fi is unavailable. But, it is advised to use Wi-Fi rather than Cellular connection when you’re at home or at a place where you can easily access the Wi-Fi connection.
Cellular takes a lot of battery, while Wi-Fi is the most convenient option to avoid the same. If you’re using the Cellular connection, you can set the limit individually for the applications that take a lot of battery.
  1. Replace battery whenever needed
Even after following all the above tips, the battery is continuously creating problems and draining too much, it might be the time to replace it.
Before getting the replacement done, check the battery health in the settings app of your iPhone. Click on the ‘Battery Health’ option under the ‘Battery’ tab, and the maximum capacity will be flashed on your screen. If the maximum capacity is 70 percent or below, you might opt for replacing the battery from the Apple store.
I’m Emma Justin . I’m a web developer living in USA. I am a fan of technology, entrepreneurship, and web development. I’m also interested in education and writing. You can visit my company website with a click on the button above.

How to Know if Someone Blocked You on iMessage?

iMessage is Apple’s messaging service that allows its users to instantly send a message using an internet connection. iMessage is free to use if the other person is also an iMessage user. Else, if you don’t have an Internet connection, the messages will be sent as an SMS that may deduct a charge.
Sometimes, the messages stop delivering to a specific person, or you don’t see any incoming messages as well. In such a situation, you might need to know if there is an error with the application or you’re blocked.

Below are the ways to know if someone on iMessage has blocked you as you do not get a notification for the same.
  1. Check bubble color of the iMessage
The messages sent from iPhone to iPhone appear in Blue bubbles, while messages sent as an SMS from iPhone to Android appear in Green bubbles. The message from an iPhone to another iPhone will only be sent as an SMS when the Internet connection is unavailable.
If the messages sent from an Apple device to another Apple device start appearing in Green bubbles, it might indicate that the other person has blocked you on iMessage. Another Possibility could be that the other person has disabled the iMessage feature.
  1. Check the message delivery notification
Below every iMessage sent appears a delivery notification that gives you the surety of the delivered message. If the other person has enabled the ‘Read Receipts’ function, you’ll also be able to see if the message has been opened or not.
There is a chance that you’ve been blocked when you stop seeing the delivery message or the ‘Read’ notification if it was enabled earlier. But this can also be the case if their phone is out of service. The best option in such a situation is to wait for a little while to be sure of it.
  1. Check for iMessage status updates
As mentioned earlier, check the delivery notification below the messages sent. If the iMessage is sent and delivered, it’ll appear in a Blue bubble with the ‘Delivered’ notification. On the other hand, if the other person has disabled iMessage, your message will be sent as an SMS text, and it’ll still notify you with a ‘Sent as text message’ notification.
But if, in any case, both the notifications do not appear after you’ve sent the message, it indicates that the other person has blocked you on iMessage.
  1. Contact the person who blocked you
If you think that the other person has blocked you, but you are still unsure of it, you may try calling the concerned person. It appears that if you try calling from the number that has been blocked from the iMessage, the call will ring for once and lead you straight away to the voicemail. This is a sure indication of you being blocked.
While the other person does not get notified about your call or voicemail, the voicemail still gets delivered that appears under the ‘Blocked Messages’ file in the Voicemail section.
  1. Disable the caller ID and try contacting again
You can try making an anonymous call to the person who has blocked you to be sure of the fact that you have been blocked. To call as an unidentified number, add *67 before entering the contact number of the other person.
You can also enable the ‘Show my Caller ID’ feature by following the steps below:
  • Go to the ‘Settings’ app on your iPhone.
  • Click on the ‘Phone’ tab from the list.
  • Next, tap on the ‘Show my Caller ID’ option and turn the slider on for the same.
When you call the other person after enabling this function, if the phone rings twice or more, it is a clear indication of you being blocked from the other person.
I’m Emma Justin . I’m a web developer living in USA. I am a fan of technology, entrepreneurship, and web development. I’m also interested in education and writing. You can visit my company website with a click on the button above.

How to Transfer Your Data from an Old iPad to the New One?

  If you have recently purchased a new iPad running on iPadOS 14 and want to transfer all your data and old memories from your previous iPad...