Monday, 6 July 2020

Accidental Preview of Samsung Galaxy Tab S7

Samsung Galaxy Tab S7 was accidentally available on Samsung’s website. This product is set to launch in August this year, but amid the speculations of its release dates and features, the product was accidentally posted on Samsung’s support page. There was no hacker to blame, as Samsung posted it on their Germany’s web page about the Galaxy Tab S7’s model number. This incident confirmed the existence of the upcoming Galaxy Tab S7.

The company has now taken down the support page, but a lot of Samsung followers caught a glimpse of the page. The model number of the Tab S7 can be linked with a Geekbench listing as it confirms that the Galaxy Tab S7 will use Qualcomm’s latest chip, i.e., the Snapdragon 865 Plus chip. This chip is also used in the Samsung Galaxy Note 20. If you observe the chip they are using to power their devices; it will be apparent that both their phone and tablet are going to provide robust performance.
The Samsung Galaxy Tab S7 is going to be a strong competitor for the latest Apple iPad Pro which was launched this year. The iPad Pro uses and A12Z bionic chips to deliver a compelling performance. Despite the leak of the Galaxy Tab S7’s support page, there isn’t much information about all the features that S7 is going to offer. But as per the analyses made out of the leaked support page, there is a huge possibility that the Tab is going to promise top-notch camera quality, that will be perfect for video calls. The rear camera of the Tab has a bump-like design that is out of style, and it won’t be safe to lay it flat on any object as it may break or damage the camera. And it is also rumored that the Galaxy Tab S7 will offer 5G connectivity, which will be of great option for peoples who require a cellular connection at lightning speed. Along with this, the Tab seems to offer a 12.4-inch display in a sleek and lightweight design.
Samsung managed to keep the price details of the product safely with them, but if we look at the prices of the previous Samsung devices, we can estimate the cost of Samsung Galaxy Tab S7. Samsung Galaxy S10 retailed for $899, and the Samsung Galaxy S20 retailed for $999. The difference in the price point of both the products was minimal. So, we can expect the tab S7 to cost between the price margin of $700 to $800.
I’m Emma Justin . I’m a web developer living in USA. I am a fan of technology, entrepreneurship, and web development. I’m also interested in education and writing. You can visit my company website with a click on the button above.

How to View YouTube Subscribers from Smartphone

YouTube is one of those digital platforms where you can show your skills and intelligence worldwide. You can measure the success of your efforts through the number of subscribers and viewers. However, if you are a well-known YouTuber and have numerous subscribers, it gets hard to see every subscriber. Fortunately, the YouTube application will let you see the entire list of subscribers. To know more about this, here is the information you need.

Access the List of Subscribers from Smartphone                                     
Whether you are an iOS, Android or Windows user, accessing the list of the subscriber is pretty easy from a smartphone. To access the list, you need to have the YouTube app in your device because it is the basic requirement. Search for YouTube in the app store of your device and download and install it.
Once the application is downloaded and installed into your device, you need to sign in with your account. Sign in with the same account that you wish to monitor. Once the account is successfully signed in, you will see the profile icon on the top-right corner of the display. There in the drop-down menu, you will see “Your Channel” option. Below your Channel Name, you will see the number of your subscribers.
Accessing the Subscribers List from the YouTube Studio
Unfortunately, some users are unable to see the subscribers from the YouTube app as well. YouTube is well aware of this issue, and that is why they have launched the YouTube Studio application, which allows users to manage their account and to receive additional information about the channel.
You need to download the YouTube Studio application. Once you download and install the application, you need to sign in with a similar account from which you want to see subscribers. The sign-in details for both YouTube and YouTube Studio will be the same.
Once everything is set up, you will see a lot of cards in the dashboard view. Among these, one will be the “Recent Subscribers” card. This specific card will show you the recent subscribers you earned on your channel. By choosing the time frame, you can choose some additional sorting options.
An Alternative
If you don’t want to download any application to see the subscribers, there is one more alternative option available that you can use. Every successful YouTuber probably uses YouTube Studio application because it shows a lot of information related to the account.
However, if you don’t prefer to install the application, you can access YouTube Studio through your mobile browser. It can be work on any browser you prefer to use. On the YouTube Studio website, the procedure is quite simple. Open the website and sign in to your account to see the profile icon on the top-right side of the screen. Activate the desktop mode and click on the Profile icon and choose “Creator Studio” option. Now you need to use the Recent Subscriber card.
I’m Emma Justin . I’m a web developer living in USA. I am a fan of technology, entrepreneurship, and web development. I’m also interested in education and writing. You can visit my company website with a click on the button above.

How to Do a Clean Installation of Windows 10

Sometimes your PC might create issues due to the absence of reinstallation or update. This is where clean installation fits just fine. A clean installation means expelling everything from the hard drive and starting fresh. Doing this can fix a great deal of issues like PC performance, battery life, and so on.

It is advised to conduct a clean installation once in a while to boost your system’s performance. Also, try to keep a backup of everything before you remove it to abstain from losing any data.
Here is a guide about how to do a clean installation of Windows 10 and more, so let us get started!
How to get started with the Clean Installation of Windows 10?
There’s a lot of preparation to do before you get into the actual process of the clean installation of Windows 10. Things you must take care of before you start the process are:
  • Backup your data
As mentioned above, you’ll have to erase everything from the hard drive, which means all the data will be lost if you don’t have a backup for the same.  ‘System Image Backup Tool’ is one of the most convenient tools to create a backup for your bulk of data. You can also backup your data to other apps such as One Drive, External Drive, etc.
  • Download important Drivers
Windows 10 installs the device drivers by default. It is necessary to keep a check on other essential drivers required and download them before beginning with the process.
  • Check Windows 10 activation
The steps to confirm the activation of Windows 10 is:
  1. Go to the ‘Settings’ app.
  2. Tap on the ‘Update & Security’ tab from the list.
  3. Select ‘Activation’ from the toolbar present on the left side of the screen.
  4. Check the activation status under the ‘Windows’ section.
  5. Check Windows requirements
Upgrading a Windows 10 PC to a newer version doesn’t require anything extra. However, if you’re upgrading Windows 7 or 8.1 to a Windows 10 version, some requirements need to be fulfilled such as Processor, Storage, Memory, etc.
  • Change Boot order on Firmware
Boot order using UEFI
For Windows 10 or 8.1, you can change the boot settings if the device consists of UEFI firmware, and steps to do the same are:
  1. Go to the ‘Settings’ app.
  2. Tap on the ‘Update & Security’ tab from the list.
  3. Select ‘Recovery’ from the left toolbar.
  4. Click on the ‘Restart Now’ button below the ‘Advanced Startup’ section.
  5. Click on the ‘Troubleshoot’ option on the next window.
  6. Select ‘Advanced Options.’
  7. The new advanced options window will appear. Select ‘UEFI Firmware Settings’ from the list.
  8. Tap on the ‘Restart’ button.
  9. Now, go to the ‘Boot’ settings.
  10. Change the boot order to start from the USB media along with the installation.
  11. Save the changes for confirmation.
Boot order using BIOS
The steps to change the boot settings using BIOS configure are:
  • Start the device and press any function key while it is booting.
Note: F1, F2, F3, F10, F12, the ESC, the DELETE are the function keys.
  • Locate the ‘Boot’ settings inside the BIOS.
  • Change the boot order to start from the USB media along with the installation.
  • Save the changes for confirmation.
  • Disable the non-required external peripheral devices
External devices are the primary issue that occurs while working with the installation process. It Is advised to detach devices like printers, disable Bluetooth devices, etc.
How to perform a clean installation of Windows 10?
The installation process of Windows 10 works in two segments: Setup and Out-of-box experience. The setup segment deals with the basic settings, while the OOBE deals with personal settings such as privacy, language, and much more.
The steps to perform a clean installation of Windows 10 are:
  1. Use the Windows 10 USB media to start the device.
  2. Press any key on your Keyboard to boot.
  3. The ‘Windows Setup’ dialog box appears. If the default settings on this window are accurate, click on the ‘Next’ option. Otherwise, you can change these settings and then move further.
  4. Click on the ‘Install Now’ button on the next window.
  5. If you’re conducting the installation process for the first time, enter the ‘Product Key.’ If you’ve done it before, mark the checkbox for ‘I don’t have a product key’ and click ‘Next.’
  6. Make a selection of the Windows 10 edition that must match your product key and click ‘Next.’
  7. Mark the checkbox for ‘I accept the license terms’ and click ‘Next.’
  8. Select ‘Custom: Install Windows Only (Advanced) in the next window.
  9. Click and select the partition on the next window and tap on the ‘Delete’ option to remove the same.
  10. Once done, select the empty drive and click ‘Next.’
Following the steps mentioned above will install the Windows 10 version on your PC.
I’m Emma Justin . I’m a web developer living in USA. I am a fan of technology, entrepreneurship, and web development. I’m also interested in education and writing. You can visit my company website with a click on the button above.
Sunday, 5 July 2020

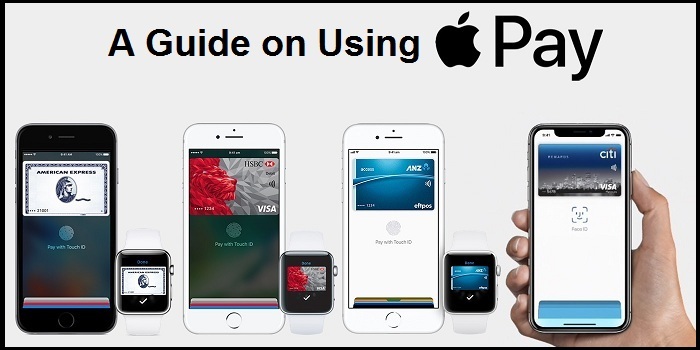
A Guide on Using Apple Pay

Apple Pay is an online payment method and was introduced with the thought of a secured mode of payment. If you’re an iOS device user, Apple Pay can prove to be a convenient option for you rather than using traditional card payment methods. Apple Pay works with almost all the Apple devices, leaving out iPhone 5 and the ones introduced before.

How to get started with Apple Pay?
The steps to set up Apple Pay on iPhone and iPad, Apple Watch, and MacBook Pro are:
iPhone and iPad
Apple Pay was introduced as a default app with the introduction of iOS 8.1, and all you need to do is link your account that will conduct the transactions for you. The steps to link the account with Apple Pay are:
  1. Go to the ‘Wallet’ app on your iPhone and iPad.
  2. Click on the ‘+’ icon on the top right corner of the screen.
  3. Follow the on-screen steps further to link an account to Apple Pay.
Apple Watch
The steps to set up Apple Pay on your Apple Watch are:
  1. Go to the ‘Apple Watch’ app on your iPhone.
Note: iPhone and Apple Watch must be paired.
  • Click on the ‘Wallet & Apple Pay’ menu.
  • Tap on the ‘Add a new card’ option and follow the instructions further to link a card to the Apple Pay.
MacBook Pro with Touch Bar
The steps to set up Apple Pay on your MacBook Pro with Touch Bar are:
  1. Before getting into the process, you must check if the websites allow Apple Pay setup or not. To do the same the steps are as follow:
  2. Go to ‘Safari’ on your Mac and click on the ‘Preferences’ option.
  3. A new window will appear. Click on the ‘Privacy’ option.
  4. Mark the checkbox for ‘Apple Pay and Apple Card’ to enable the websites to accept the Apple payment mode.
  5. Go to the ‘System Preferences’ option tap on ‘Apple & Wallet Pay.’
  6. Hit the ‘Add Card’ button and enter the iCloud details to sign in to your account if you’re not.
  7. If you have an existing card linked already, you can make the payment simply by adding the security code for the same.
MacBook Pro without Touch Bar
Older MacBook Pros do not permit you to use stored card information. Thus, you’ll have to use the card information using your iPhone or Apple Watch.
The steps to set up Apple Pay on your MacBook Pro without Touch Bar are:
  1. Go to the ‘Settings’ app on your iPhone.
  2. Click on the ‘Wallet & Apple Pay’ tab.
  3. Turn the slider on for ‘Allow payments on Mac.’
How to use Apple Pay?
Using Apple Pay within Apps
A ‘checkout with Apple Pay’ option is available within applications via which you can make the Apple transactions. All you need to do is opt for the ‘Apple Pay’ option as the mode of payment and select the card you want to make payment through, if there are multiple cards linked. Enter the details like billing and shipping address, and confirm your transaction by using a double authentication step that is Touch ID or Face ID.
 Using Apple Pay within Stores
Only specific stores allow you to use Apple Pay mode of payment. Thus, you’ll have to make sure that you can pay via the same. All you need to do is double-press the lock or the home button, depending upon the iPhone and enter the passcode of your phone. Next, hold it close to the contactless reader and wait until your screen flashes ‘Done.’
Apple Watch works almost the same. Double-tap the button on your Apple Watch and hold it near the contactless reader. It’ll take a few seconds, and the transaction will be done.
Note: It’ll work when you have a card linked to your Apple Pay account.
Using Apple Pay on the Web
For a transaction to take place using the web, all you need to have is an Apple device and the site you want to make payment. Using Mac with a Touch ID will ask you to authenticate using the Touch ID on the Touch Bar. For a Mac without a Touch ID, the authentication is done by confirming the payment via iPhone or Apple Watch.
Is it secure to use Apple Pay?
Apart from the CVV used by the card for a secure experience, Apple Payments use a security code that needs to be entered each time while making a payment.
In case you lose your Apple device, you can stop the misuse of the same by using ‘Find my iPhone service.’
Moreover, the data regarding your payment method or the card doesn’t go out to the sellers. Thus, it is safe to say that Apple maintains your privacy standards.
I’m Emma Justin . I’m a web developer living in USA. I am a fan of technology, entrepreneurship, and web development. I’m also interested in education and writing. You can visit my company website with a click on the button above.

What are Hype Points in Fortnite?

Hype Points are back in the Fortnite, yet there are plenty of gamers who are still unfamiliar with this competitive mode. One of the most vital reasons for the popularity of Fortnite is that they continue to evolve something developing from the previous. This is what makes the game more epic and interesting. Rather than always focusing on something new, Epic Games also focus on evolving as well. Most of the players who are playing Fortnite from the beginning still haven’t gotten fed up a bit from the game because they always find something special to enjoy.

Many players think that Hype points are new, but actually, it has made its return into the game, and players should know about it. Fortnite is not just a battle royale game where players only fall, fight, or die; there are still many things in the game that are worth exploring and acquiring. Hype event will start soon, and players need to earn as much as Hype points within the three-hour window. Once a week and in a three-hour window, players are going to compete for Hype points. This is going to be interesting because now you will see rookies and experienced competition in ten matches.
There are two ways to earn the Hype, which is either through finishing position or elimination. When you make elimination, you will earn a single Hype point, which seems quite great, but for keeping the survival long, you need to get your hands into big numbers. If you finish into any number between the top 75, you will earn player Hype. The Hype is not fixed on a single number; it can be increased if you keep your survival last longer. If you make your spot into the top 25, you will earn 5 points, which is quite a great number. However, if you want more, you need to finish into the top 10, and you will earn 8 points, but the victory player will earn 14 points, which is the biggest number of the match. So if you keep yourself up and make your position as a victory player, you will earn 14 points during the match of Hype Nite. 
The contenders of Hype Nite are separated into three leagues where every league is divided into three divisions. This setup is to make sure that players compete with the same level of opponents. Well, this is a necessary move and the way the match is organized completely amazing. For the least Hype players, there will be an open league available too, but they can move to Contender and Champion League if they enhance their performance for Hype. The match of Hype Nite will help on every Sunday in the period of Season 3.
In the entire division of the Hype match, division six is the toughest where you need to play smartly. In the following division, the chances of losing Hype points are high, so keep trying to set a particular amount of Hype points. You can make your strategy better or do some changes with Fortnite control settings. It will help you to stay longer into the field, and as long as you are in the, your chances of getting the Hype points are high. Hype Nite is not like any other battle, and there you will find a similar skill level opponent and higher skill opponent as well. Just keep the focus on getting in the highest rank, and you will get high Hype.
After hearing about this event, most of the players are excited because the setup of the match and the league player procedure is unique. Those players who are new are excited to be part of such an event, and whoever played this before will be there to show their skills. Season 3 just started, and players are already getting some great events and challenges to play.
I’m Emma Justin . I’m a web developer living in USA. I am a fan of technology, entrepreneurship, and web development. I’m also interested in education and writing. You can visit my company website with a click on the button above.

How to Cancel YouTube TV Subscription

Since the launch of YouTube TV, it was considered as one of the most valuable TV streaming platforms. However, the time has changed now and most of the users who were using YouTube TV, are no longer part of it. Users need to pay for the subscription to use the YouTube TV services. After purchasing the subscription, the corresponding fee will be deducted from your Debit/Credit card. However, if you are no longer using the service and still paying, you can cancel the subscription to save up. So here’s how you can cancel the YouTube TV subscription.

Cancel the YouTube Subscription TV from Web                
You can cancel the subscription easily if you are accessing the YouTube TV account on the desktop website. Once you open your account, you will see your profile on the top right side of the website. At the profile section, you are allowed to make changes in your profile. For cancelling the subscription, you need to access this section and follow the steps below:
  1. Choose Settings key from the drop-down section.
  2. Now press “Pause or Cancel Membership” option below YouTube TV column.
  3. YouTube TV will approach you not to cancel the subscription. They will offer you some options to keep you stick to the subscription.
  4. If you are all set to cancel the membership, just choose the “Cancel Membership” option in the below right corner side of the page.
  5. On the following page, you need to choose the reason for cancelling the subscription.
  6. Once you have marked the reason, choose the option “Continue Cancelling.”
  7. However, if you choose the “Other” option, you need to mention an in-depth reason to cancel the membership.
  8. Now you need to tap on “Cancel Membership” option for a final time to shut down the YouTube TV account.
Cancel the Subscription from Mobile Application
Well if you don’t have access to the computer, you can still cancel the subscription from your mobile device. For cancelling the subscription, you need to access the YouTube TV app for Android, but unfortunately for iOS and iPad users, it is not available yet. 
  1. In the YouTube TV application, you will see your avatar on the top-right side.
  2. Now in the profile section, choose the “Settings” option.
  3. Choose “Membership” option.
  4. Choose “Pause or cancel membership” option below the YouTube TV column.
  5. If you are not ready to end the subscription, you can pause the membership for a couple of weeks. However, if that’s not what you want, so click on the “Cancel” option to go ahead with the procedure.
  6. Select the reason why you want to cancel the membership.
  7. Choose any option except others option if you don’t want to give detailed information of reason.
  8. Tap on the “Continue Cancelling” key to move ahead.
  9. Now you will see the final cancellation screen. Once you click on “Cancel Membership” it will shut down your account.
So these were the simple steps you need to follow to cancel the subscription. Once you cancel the subscription, you no longer have to pay for the services that you do not use!
I’m Emma Justin . I’m a web developer living in USA. I am a fan of technology, entrepreneurship, and web development. I’m also interested in education and writing. You can visit my company website with a click on the button above.

Friday, 3 July 2020

How to Make a New Partition on macOS

Looking for creating a new partition on the hard disk of Mac? Well, the procedure is quite simple. Creating a partition shows the separate drive in your Mac. In a single drive, you can make multiple drives from partition; however, it is still the same drive but different sections. Your macOS will treat every drive as a separate drive. You can make a separate category of every partitioned drive. This procedure is quite helpful because, from this, you can keep various types of data in separate drives. However, it is also possible if you want to keep the backup data in separate drive with all the media and other items. Nevertheless, if you are willing to use multiple operating systems from one drive, the dual boot will help you too.

Whatever is the reason, the partition of drives really helps the user. Even if you have a small or bigger drive, you can make a partition easily with your preferred space on the drive. Whatever you will do in one drive will not make any effect on another drive which is really a great thing. So if you are looking to make a partition in your drive, here is what you should know.
How to Add a New Disk Partition in macOS
You can partition any internal and external drive, but for doing that you need to ensure the drive is connected to Mac. Once you connect the drive with Mac. You can also back up the drive before the partition if you want to keep your data safe anything wrong happens.
  1. Now launch Disk Utility application. It will be inside the Utility folder of the application folder in the Mac.
  2. Here you will see internal and external volumes listed respectively.
  3. Tap on any disk volume you prefer.
  4. Tap on the “Partition” option and then tap on “Partition.”
  5. Now press + icon, but this is unavailable, so the volume you have chosen cannot be partitioned because it is protected.
  6. Mention the name of the partition disk. The name of the volume must be at least 11 characters.
  7. Choose the format of the new partition. If you don’t know which one to select, so choose the APFS option.
  8. Mention the size of the partition drive, or you can use the image on the left side to manage the partition.
  9. Now tap “Apply”, and the partition will be formed.
  10. Tap “Done” if you have completed the procedure.
  11.  After you form the newly partitioned disk, it will appear on the Finder and also Desktop.
Now you can add as many as possible files, media, and many more files into the partitioned disk. The utility app provides great help and is useful for many types of things. Whenever you are formatting one partitioned drive, it will not make any impact on the other disk. However, you can delete the partitioned disk anytime you want, but you will not get the data back so first move the data in the safe drive.
I’m Emma Justin . I’m a web developer living in USA. I am a fan of technology, entrepreneurship, and web development. I’m also interested in education and writing. You can visit my company website with a click on the button above.
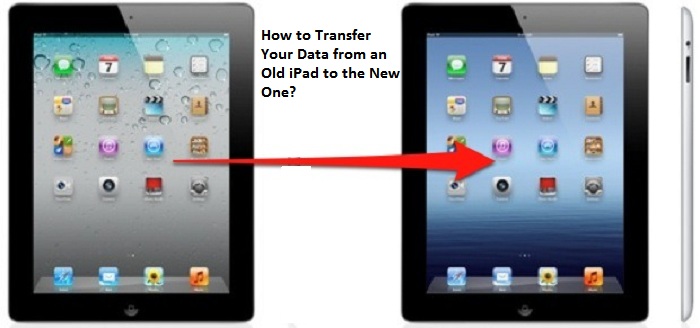
How to Transfer Your Data from an Old iPad to the New One?

  If you have recently purchased a new iPad running on iPadOS 14 and want to transfer all your data and old memories from your previous iPad...