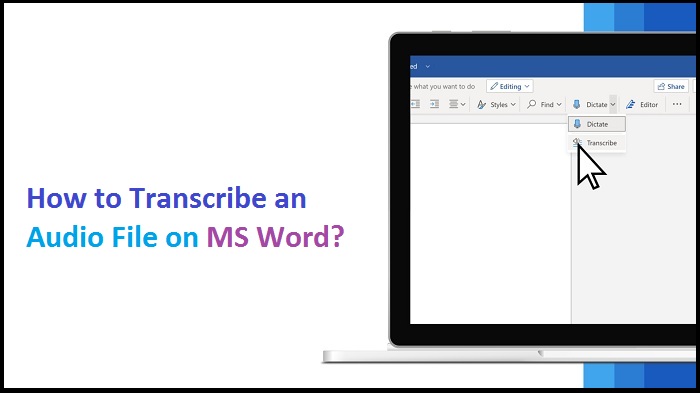
Microsoft has introduced an audio transcription feature into its Word application for the users who want to transcribe audio files quickly on their systems. This feature is available on the web-based MS Word edition. Once the conversation is transcribed, MS’s Artificial Intelligence splits each separate speaker and then breaks the entire conversation into several sections.

One can easily transcribe audio recordings directly to text. In order to transcribe a particular audio file with MS Word, you must have a Microsoft 365 premium subscription.
Here is how to transcribe your audio file directly in MS Word.
How to Record and Transcribe Live Audio
You might have Word Transcribe Audio that you record directly within MS Word.
- Login to Microsoft 365 and then launch MS Word. Go to the Home tab and then press the arrow located just after the option “Dictate” and then choose “Transcribe” directly from the menu tab that follows on the screen.
- Now, you need to provide Microsoft Permission for accessing your microphone.
- Wait for a little for the Transcribe window to launch at the right-hand side section of your respective window. Then choose the Start Recording tab there.
- When selected, the timer will begin. After that, you need to start speaking.
- Once you are all set, then press the Pause tab and then choose the option “Save and Transcribe Now.”
- It might take some time for Microsoft Word to finish transcribing your audio file and uploading it to OneDrive.
- Once it is completed, you will view the transcription page on the same panel you recorded the audio. Every section shows a particular timestamp with important details such as the speaker’s name and transcribed text. Microsoft separates the text automatically by using the speaker.
- In case Microsoft Word detects more than one speaker, you will be able to see several speakers with a name like “Speaker 1,” “Speaker 2,” and more.
- If Microsoft Word can’t detect multiple speakers, you will see the term “Speaker.”
- You may observe that the transcript doesn’t reflect the recorded audio perfectly and accurately. You may edit a particular section of your transcript file by hovering your mouse just over the incorrect text and then choose the pen symbol there.
- Now, you may easily make modifications found in this specific section. You may edit the name of your speaker as well as the entire instance. You need to mark the box related to the option “Change All Speaker” for modifying your transcription. Once you are all done, hit the checkmark. You may use the playback control bars to revisit the audio file or recorded audio. It is necessary if the transcript is lengthy.
- You can’t remember exactly who said what in the audio. Below are the functions of every button available from left to right:
- Rewind
- Playback speed
- Fast forward
- Volume
- Play/Pause
- Once you are all finished modifying your transcription, you may add it to the particular document by selecting the tab “Add All To Document” located at the lowermost section of the page.
- When it is all set, the content and audio recordings of the particular transcript will show up in the document.
Uploading and Transcribing Audio Files
In case you have the audio file that you desire to subscribe then you may easily upload it to Microsoft Word. Login to MS 365 and then open Microsoft Word.
- Go to the Home button and then tap the arrow located just after the Dictate option and then choose “Transcribe” from the pop-up menu.
- Now, the “Transcribe” sections will pop-up at the right-hand side section of the particular window. Then, choose the option “Upload Audio.”
- Next, you may easily upload these mentioned audio files with ease:
- M4A
- WAV
- MP3
- MP4
- After a while, File Explorer (Finder for Mac) will launch. Then, reach to the audio file location and then tap on the same.
- Next, press the Open button and proceed.
- Wait for a little for the transcribing process for the audio file to start by Microsoft. It could take several minutes based on the size of the file you are transcribing.
- When you are all set with the transcribing process, then the respective text will appear on the next screen.
- In case you are facing similar issues with your audio file, you may easily modify the text section by hovering your mouse cursor on the same and then press the Pen icon there. In case you wish to hear audio once more, then use the audio controls.
- After that, edit the speaker’s name by tapping the option box “Change All Speaker box.” You may make modifications to the text section. Once finished, hit the checkmark there.
- Once you have edited your contents of the transcript, tap the “Add All To Document.”
- Wait for a little while, the text and audio file of the respective transcript will get added to your Microsoft Word file.
Conclusion One of the most important and highly demanded utility features in MS Word is “Audio Transcription.” It enables the user to convert an audio file directly to the text and separates each text-based file by separating each speaker.
I’m Emma Justin . I’m a web developer living in USA. I am a fan of technology, entrepreneurship, and web development. I’m also interested in education and writing. Also You can read our Blog, pctechwire.com

No comments:
Post a Comment